Creating A Project
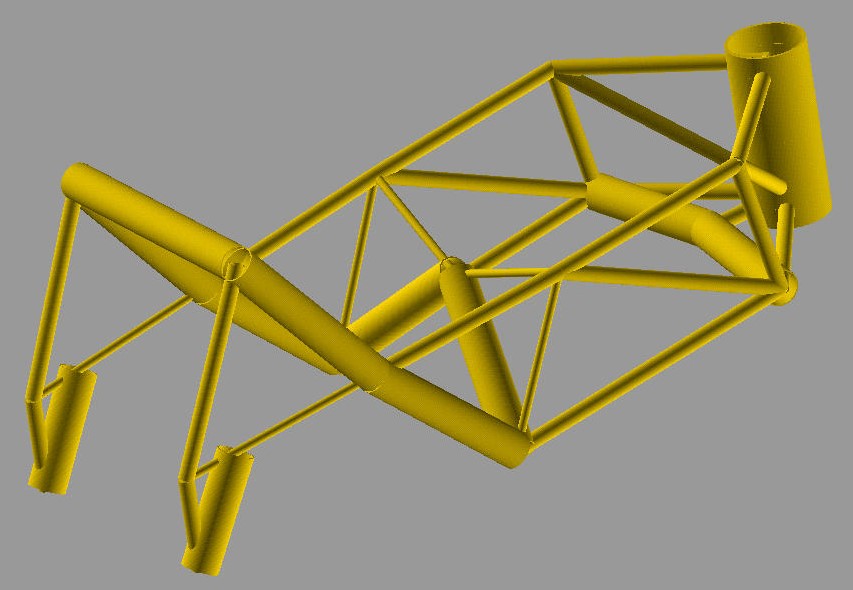
This example shows how to create from scratch a DCS project consisting of an Ansys APDL beam model of a tubular steel trellis motorbike-frame. After creating the project configuration, 10 design points with randomly chosen parameter values are created and set to pending.
The model is parametrized as follows:
three custom tube types are defined whose radius and thickness can vary in a certain range;
for each tube in the frame there is a string parameter specifying which custom type it should be made of;
output parameters of interest are the weight, the torsion stiffness and the maximum von Mises stress for a breaking load case.
For further details about the finite element model and its parametrization, see “Using Evolutionary Methods with a Heterogeneous Genotype Representation for Design Optimization of a Tubular Steel Trellis Motorbike-Frame”, 2003 by U. M. Fasel, O. Koenig, M. Wintermantel and P. Ermanni.
The project setup script as well as the data files can be downloaded here MAPDL Motorbike Frame Project.
We shall now dissect the project setup script in detail.
Import modules and instantiate the DPS client
The script starts by importing some generic modules and some key ansys-dcs-client classes.
Next we connect to a DCS server running on the localhost with default username and password.
import os
import random

from ansys.dcs.client.dps import Client
from ansys.dcs.client.dps.resource import (Configuration, DesignPoint, File,
                                           FitnessDefinition, Project,
                                           SuccessCriteria)

client = Client(dcs_url="https://127.0.0.1/dcs", username="dcadmin", password="dcadmin")
Create an empty project and a configuration
Once the client is available, we can define a new project and send it to the server.
proj = Project(id="mapdl_motorbike_frame", display_name="MAPDL Motorbike Frame", priority=1, active=True)
proj = client.create_project(proj, replace=True)
Next, a configuration object is created.
cfg = Configuration(name="Configuration.1", active=True)
File resources
The first step to fill the project configuration is to define the files resources. Besides the name and type,
for each file we need to specify the evaluation_path, i.e. the relative path under which the file instance
for a design point evaluation will be stored. Moreover, if the file needs to be uploaded to the server, we also need to provide the path to the local file
as src argument.
cwd = os.path.dirname(__file__)
files = []
# Input File
files.append (File( name="mac",evaluation_path="motorbike_frame.mac",
                    type="text/plain", src=os.path.join(cwd, "motorbike_frame.mac") ) )
# Output Files
files.append( File( name="results", evaluation_path="motorbike_frame_results.txt", type="text/plain" ) )
files.append( File( name="img", evaluation_path="file000.jpg", type="image/jpeg", collect=True) )
files.append( File( name="img2", evaluation_path="file001.jpg", type="image/jpeg", collect=True) )
files.append( File( name="out", evaluation_path="file.out", type="text/plain", collect=True) )
File resources are then created on the server.
files = proj.create_files(files)

# For convenience, we keep a reference to the input and result files.
mac_file = files[0]
result_file = files[1]
Parameters definition
Creating a parameter requires to first provide a parameter definition and then specify a parameter location.
# Input params: Dimensions of three custom tubes
float_input_params=[]
for i in range(1,4):
    pd = cfg.add_float_parameter_definition(name='tube%i_radius' %i, lower_limit=4.0, upper_limit=20.0,default=12.0 )
    cfg.add_parameter_location(key_string='radius(%i)' % i, tokenizer="=", parameter_definition_name=pd.name, file_id=mac_file.id)
    float_input_params.append(pd)
    pd = cfg.add_float_parameter_definition(name='tube%i_thickness' %i,lower_limit=0.5, upper_limit=2.5, default=1.0 )
    cfg.add_parameter_location(key_string='thickness(%i)' % i, tokenizer="=", parameter_definition_name=pd.name, file_id=mac_file.id)
    float_input_params.append(pd)

# Input params: Custom types used for all the different tubes of the frame
str_input_params=[]
for i in range(1,22):
    pd = cfg.add_string_parameter_definition(name="tube%s" %i, default="1", value_list=["1","2","3"] )
    cfg.add_parameter_location(key_string='tubes(%i)' % i, tokenizer="=", parameter_definition_name=pd.name, file_id=mac_file.id)
    str_input_params.append(pd)

# Output Parames
for pname in ["weight", "torsion_stiffness", "max_stress"]:
    pd = cfg.add_float_parameter_definition(name=pname)
    cfg.add_parameter_location(key_string=pname, tokenizer="=", parameter_definition_name=pd.name, file_id=result_file.id)
Process Step
In a process step, we specify which application should be executed, its requirements, which input and output files are linked to it, and optionally also the criteria for determining whether the process step completes successfully.
# Process step
cfg.add_process_step(   name="MAPDL_run",
                        application_name="ANSYS Mechanical APDL",
                        application_version="20.1",
                        execution_command="\ %\ executable\ %\ -b -i \ %\file:mac\ %\ -o file.out",
                        max_execution_time=20.0,
                        cpu_core_usage=1,
                        execution_level=0,
                        memory=250,
                        disk_space=5,
                        input_file_ids=[f.id for f in files[:1]],
                        output_file_ids=[f.id for f in files[1:]],
                        success_criteria= SuccessCriteria(
                            return_code=0,
                            expressions= ["values['tube1_radius']>=4.0", "values['tube1_thickness']>=0.5"],
                            required_output_file_ids=[ f.id for f in files[2:] ],
                            require_all_output_files=False,
                            required_output_parameter_names=["weight", "torsion_stiffness", "max_stress"],
                            require_all_output_parameters=False
                        ) )
Note that multiple process steps can be defined.
Fitness definition
In an optimization context, different type of fitness terms can be combined into a fitness definition object.
fd = FitnessDefinition(error_fitness=10.0)
fd.add_fitness_term(name="weight", type="design_objective", weighting_factor=1.0,
                    expression="map_design_objective( values['weight'], 7.5, 5.5)")
fd.add_fitness_term(name="torsional_stiffness", type="target_constraint", weighting_factor=1.0,
                expression="map_target_constraint( values['torsion_stiffness'], 1313.0, 5.0, 30.0 )" )
fd.add_fitness_term(name="max_stress", type="limit_constraint", weighting_factor=1.0,
                expression="map_limit_constraint( values['max_stress'], 451.0, 50.0 )")
cfg.fitness_definition =fd
Submit the configuration
The next step is to send the configuration to the server.
cfg = proj.create_configurations([cfg])[0]
Design Points
Finally, 10 design points with randomly chosen parameter values are created and set to pending.
dps = []
for i in range(10):
    values = { p.name : p.lower_limit + random.random()*(p.upper_limit-p.lower_limit)  for p in float_input_params }
    values.update({ p.name: random.choice(p.value_list) for p in str_input_params})
    dps.append( DesignPoint( name=f"DesignPoint.{i}", values=values, eval_status="pending") )

dps = cfg.create_design_points(dps)